
Changed Data Capture as the term implies is used to capture the data that is inserted, updated and deleted at the source side and replicating the same at the target. ODI have a Journalizing KM to do the required implementation and it is basically into two types simple and consistent.
The goal of Change Data Capture is to track change in the source data. When running integration interface, ODI can reduce the volume of source data processed in the flow by extracting only the changed data.
Reducing the volume of source data is useful in many fields such as:
The goal of Change Data Capture is to track change in the source data. When running integration interface, ODI can reduce the volume of source data processed in the flow by extracting only the changed data.
Reducing the volume of source data is useful in many fields such as:
• Synchronization
• Replication
• Replication
These changes are captured by Oracle Data Integrator and transformed into events that are propagated throughout the information system
Oracle Data Integrator supports two journalizing modes:
Oracle Data Integrator supports two journalizing modes:
• Simple Journalizing tracks changes in individual datastore in a model.
• Consistent Set Journalizing tracks changes to a group of the model's datastore, taking into account the referential integrity between these datastore. The group of datastore journalized in this mode is called a Consistent Set.
• Consistent Set Journalizing tracks changes to a group of the model's datastore, taking into account the referential integrity between these datastore. The group of datastore journalized in this mode is called a Consistent Set.
The journalizing components are:
• Journals: Where changes are recorded. Journals only contain references to the changed records along with the type of changes (insert/update, delete).
• Subscribers: CDC uses a publish/subscribe model. Subscribers are entities (applications, integration processes, etc) that use the changes tracked on a datastore or on a consistent set. They subscribe to a model's CDC to have the changes tracked for them. Changes are captured only if there is at least one subscriber to the changes.
• Journals: Where changes are recorded. Journals only contain references to the changed records along with the type of changes (insert/update, delete).
• Capture processes: Journalizing captures the changes in the source data stores either by creating triggers on the data tables, or by using database-specific programs to retrieve log data from data server log files. See the documentation on journalizing knowledge modules for more information on the capture processes used.
• Subscribers: CDC uses a publish/subscribe model. Subscribers are entities (applications, integration processes, etc) that use the changes tracked on a datastore or on a consistent set. They subscribe to a model's CDC to have the changes tracked for them. Changes are captured only if there is at least one subscriber to the changes.
When all subscribers have consumed the captured changes, these changes are discarded from the journals.
• Journalizing views: Provide access to the changes and the changed data captured. They are used by the user to view the changes captured, and by integration processes to retrieve the changed data.
These components are implemented in the journalizing infrastructure.
2)Requirement:
2)Requirement:
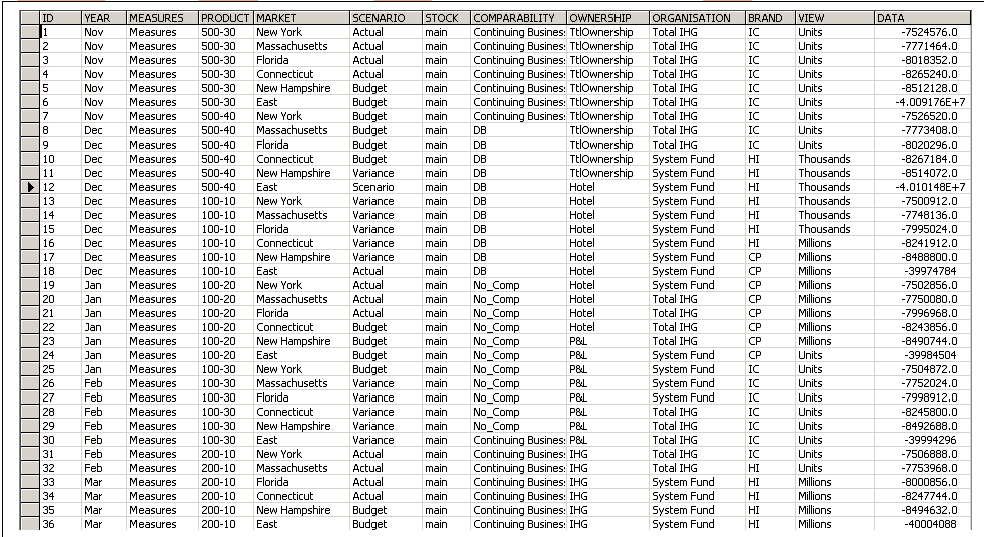
We have a data store of some description and the data gets automatically incremented, instead of having to load all the data into the database at a set interval you can use ODI to capture the additional data and with the use of a package monitor when the change occurs resulting in a load executing
3) Creating essbase Data Server physical Schema and Logical schema for using as Target:
Step: 1) Go to Start :- Program Files :- Oracle :- Oracle Data Integrator explore ODI and login to work repository.
 Step: 2) After successfully login to work repository go to Topology Navigator select Physical Architecture Tab and select Technology and expand it. Go to the Hyperion Essbase Right Click and select ‘New Data Server’.
 Step: 3) In the definition tab enter the following details as shown in the picture below:
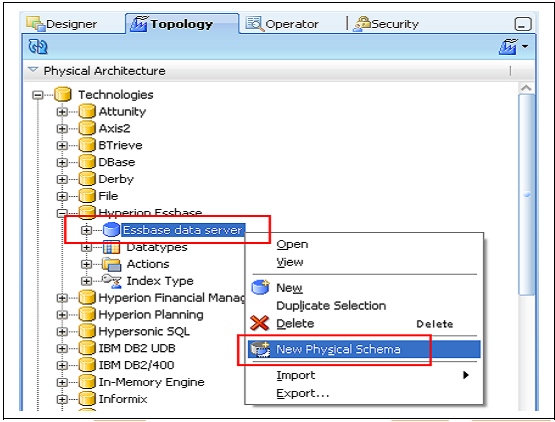
Step:5) In Technology Tab go to Hyperion Essbase expand it and select newly create data server Right Click and select ‘New Physical schema’.
Step:7) In the definition tab enter the Essbase Application name to which you want to connect..

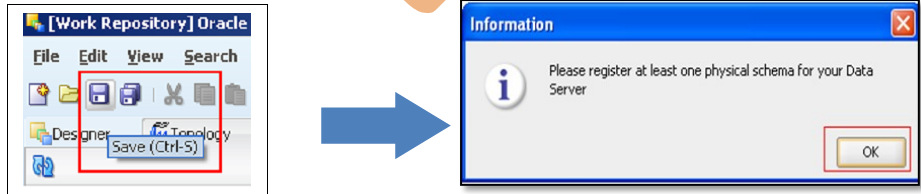
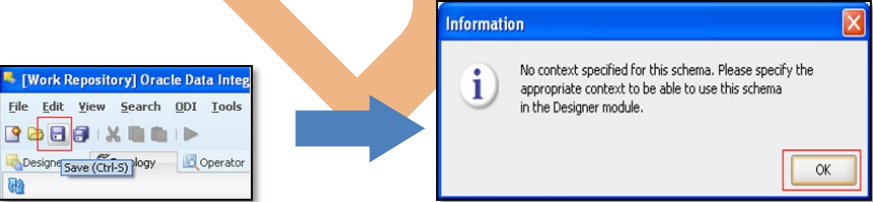
Step: 8) Click on Save it will ask you to specify the context press ‘OK’.

Step: 9) Go to the Logical Architecture tab Expand Technologies and select Hyperion Essbase Right-click and select ‘New Logical Schema’.

Step: 10) Give appropriate name to logical schema and set the Context to Hyperion Essbase physical schema.

Step: 11) Click on ‘Save’.
Step: 12) Go to the ODI Designer and create new Project with appropriate name.
Step: 12) Go to the ODI Designer and create new Project with appropriate name.

Step: 13) Click on ‘Save’. You can check in the project tab

Step: 14) Expand project go to knowledge module right click and import following knowledge modules.
RKM Hyperion Essbase
LKM Hyperion Essbase Metadata to SQL
IKM SQL to File Append
RKM Hyperion Essbase
LKM Hyperion Essbase Metadata to SQL
IKM SQL to File Append

Step: 15) Press Ctrl and select all three knowledge


 Step: 16) ‘Save’.
Step: 17) Now go to the model tab and create new model Folder.


Step: 18) In the definition tab enter the details

Step:19) Go to the Reverse Engineer tab select customize check box and enter details as follows:

Step:20) ‘Save’
 Step:21) Newly created Model will be available for Reverse Engineering go to Model tab select Hyperion planning model and Right Click and select Reverse Engineers. Before Reverse Engineer the models make sure your agent services are running if not start it with following command:
C:\oracle\Middleware\Oracle_ODI1\oracledi\agent\bin>agent -NAME=localagent

Step: 22) Now you can reverse engineer it..


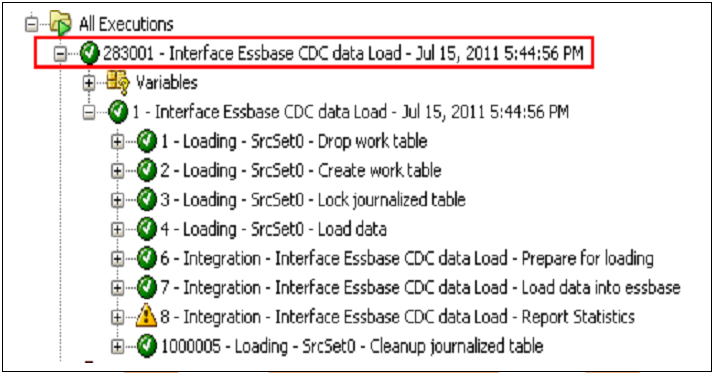
Step: 23) Go to the Operator Tab check whether the Execution run successfully or not.

If all the checks are green that means your model reversed successfully.
Step: 24) Go to the Designer and open model tab expand Hyperion Essbase model again.
You can check all the dimensions are visible there from your Essbase application.
You can check all the dimensions are visible there from your Essbase application.

4) Creating MS SQL server Data Server Physical Schema and Logical Schema for using as source
Step: 1) Now we need to create data server for MS SQL RDBMS these are the step to create it. Go to the Topology Navigator in Physical architecture expand Technology tab select Microsoft SQL Server Right Click and select new data Server. Specify following details:
Name: Appropriate name
Instance: bispfdm[server_name]
User: sa
Password: ******
Name: Appropriate name
Instance: bispfdm[server_name]
User: sa
Password: ******

Step 2) Go to the JDBC tab and set appropriate drivers and url for the SQL Server database. Test the connection by pressing the Test connection button.

 Step: 3) Save it.
Step: 4) In Technology Tab go to SQL Server expand it and select newly create data server Right Click and select ‘New Physical schema’. Select schema in which your database located.

Step: 5) Click on Save it will ask you to specify the context press ‘OK’.
Step: 6) Go to the Logical Architecture tab Expand Technologies and select Oracle Right-click and select ‘New Logical Schema’.

Step: 7) Click on ‘Save’.
Step: 8) Now go to Designer Navigator and then model tab and create new model Folder.
Step: 8) Now go to Designer Navigator and then model tab and create new model Folder.

Step: 9) Save it.
Step: 10) Now go to the newly created folder and create new model.
Step: 10) Now go to the newly created folder and create new model.

Step: 11) In the definition tab enter the details.

Step:12) Save the model it will visible in your model folder now select it Right click and select reverse engineer.

Step: 13) Go to the Designer and open model tab expand Oracle model again. You can check all the tables’ metadata are visible there from your Oracle schema.
 Now the target is ready to set for loading the data.
 5) Setting up the Change data Capture on Source
We need to import the Journalizing Knowledge module

We will be only tracking changes in one table so we will be using the Simple KM. Now we need to specified Journalizing Knowledge module for the source model we have created for the SQL server.

The next step is to flag the datastore that is going to be journalized, right click the datastoreand select “Changed Data Capture” > Add to CDC


The journal can be started that will capture the changes. Right click the datastore > “Changed Data Capture” > “Start Journal”, select the subscriber and another session will be started; this will create the required journal tables, views and triggers.


6)Creating Interface
Now the journalizing is active an interface can be created which will take the new records and load them into our essbase database.
Step:1) Create interface

Step: 2) Go to mapping tab specify the source and target tables and map them

Step: 3) Now we need to select the Journalize data only check box.

Step: 4) Our target is not capable of performing Transformation so we need to change the Staging area from target to another server we will select memory engine

Step: 5) Move to the Flow tab and specify the required knowledge modules.

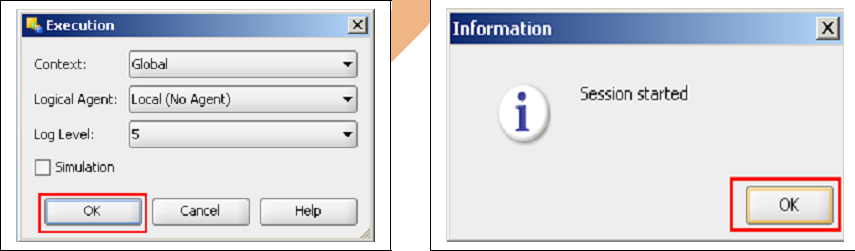
Step: 6) Save the interface and execute it .It will load the change data only to target essbase application.


7)Creating packages
Step: 1) Create a package inside the project w have created previously.

Step: 2) Drag and drop waitForLogData Api tool from Change Data Capture and update the require field

Step: 3) We need to drag and drop the interface to diagram tab and specify the sequence of execution.


No comments:
Post a Comment