
Essbase Beginner’s Guide
Installation Essbase 11.1.1.3
Chapter-IV
Installation Essbase 11.1.1.3
Chapter-IV

All Hyperion products are available in http://edelivery.oracle.com/. You need to download the required products from there.
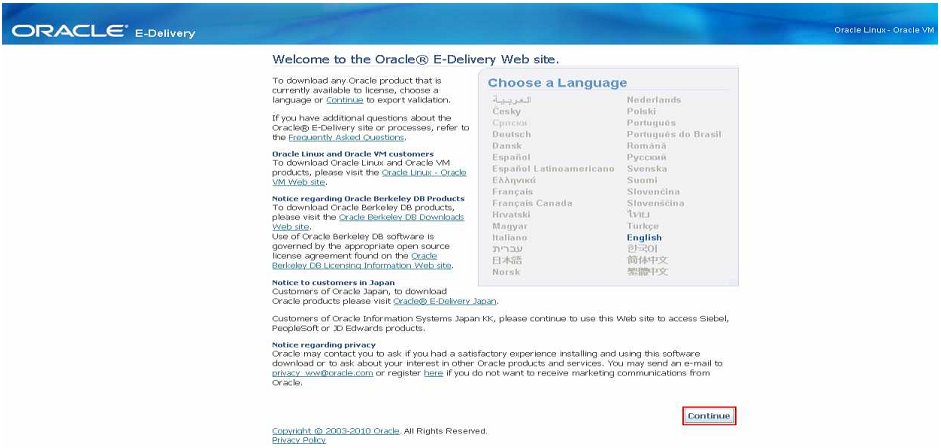
Step 2) Required Login
Check the both check box to ensure to agree Terms & Condition


Step 3) The Product Search and selection

Step 4) Download all the suits those are highlighted

Installation of Hyperion 11.1.1.3
You can download Essbase 11.1.1.3 from the http://edelivery.oracle.com. Once you download all the required components, keep them in a common folder. After all components placed successful,y go back to installer folder and Click the highlighted InstallTool.cmd

After run installing InstallTool.cmd, you will get a bellow command prompt.

Installation of Foundation Services
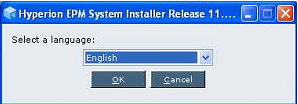
Specify the language.
Startup Screen wizard will guide you through installation Hyperion product suite.

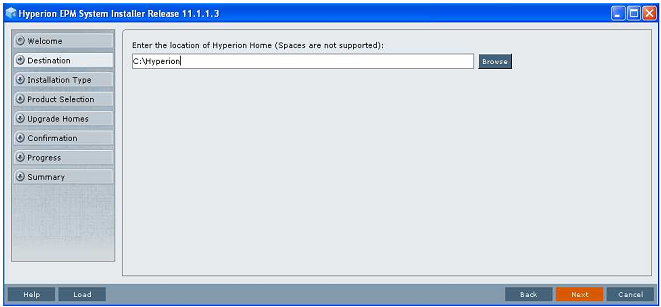
Select the destination for “Hyperion Home” directory. You can’t change “Hyperion Home” directory once it set during installation. However, the Hyperion Home migration utility can be used to change Hyperion Home.
Select installation type “Choose components individually”. Components are chosen in case of user may not be required all the components. You can select components manually.

Select component to install ( We are going to install Shared service first)
1. Hyperion Foundation (Shared Service only, uncheck all other components)
1. Hyperion Foundation (Shared Service only, uncheck all other components)

List of Product to be installed

It registers itself to the .net Architecture

Completion of Installation

All component install successfully.

Installation of Essbase
Open the folder in which you kept all downloaded files. Run “Install.cmd” file again. The EPM system installer wizard will open.

The “Hyperion Home” directory is already created while installation of foundation services. You can’t change “Hyperion Home” directory path. The new component will install in the same directory.

The “choose components individually” option allows you to select component manually.

This time select “Essbase” in the product list.

When you click on “+” sign, you will get to know what product is going to be installing.

This is the confirmation list of selected components.
 Click on next.
Installation status

You can check that the “Essbase” get installed or not.
Start :- All Program :- Oracle EPM System à Essbase
You can see all selected component has come in the program list.

Configuring Hyperion 11.1.1.3
Launch the EPM Configuration Tool Then steps to connect Oracle 10g with Shared service and registry Database Configuration.
All Programs :- Oracle EPM System :- Foundation Services :- EPM System Configuration
Launch the EPM Configuration Tool Then steps to connect Oracle 10g with Shared service and registry Database Configuration.
All Programs :- Oracle EPM System :- Foundation Services :- EPM System Configuration

Select components those are going to configure.

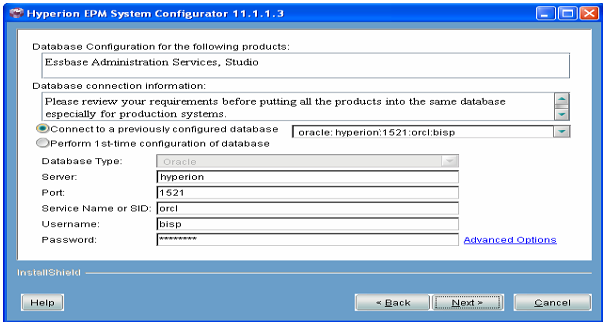
Enter database type, server name, port number and SID. Default oracle port number and SID are “1521” and “orcl” respectively. It is good to create a separate schema where your all configuration components will store. In my case I have user bisp as schema.

EPM System common settings, Enter SMTP server name which is your computer name. Enter administrator user name and password.

Database configuration settings click on next
Select application server deployment type “automatic”. However you can select manual as well.

Deployment to Embedded Java Container

Settings for “Essbase” server configuration

Status of component installation.

Installation of Essbase server is completed successfully.

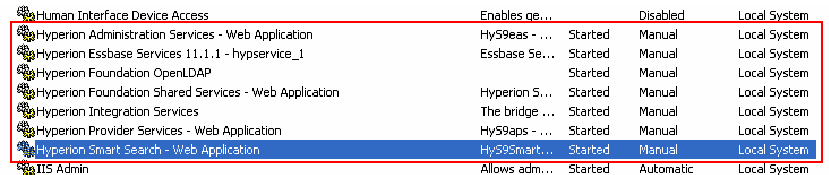
After configuration of “Hyperion Essbase” all Hyperion services will show in the services. Keep all Hyperion services manually, so that system services will not get slow.
Components Verification
You can check that Essbase server is working or not.
All Program à Oracle EPM system à Essbase à Administration Services

Click on Start Administration services console

Enter administrator server name, user name and password. This you just specified while configuration.
Administration Services

Click ok
Click on “+” sign, this will show you connected server. You can check server properties and user information.

You can add new server by Right clicking on Essbase server.

Enter server name, user name and password for adding server. Enter local host as server name for connecting Essbase server with local system.

You can see the sample applications are showing inside the local host server. .

Client Services
When you open MS Excel, the excel spread sheet add-ins comes automatically.
This shows Essbase client is working properly. 
Hyperion Smart View

Click on Essbase :- Connect
Enter server name, user name and password. Click ok then select application name and database.
Enter server name, user name and password. Click ok then select application name and database.

Here you can analyze Essbase application in Excel.

Essbase Studio
You can check that Essbase studio is up and running. First start server
You can check that Essbase studio is up and running. First start server

When you start server, you will have this command prompt.

Enter server name and administrator as user name and “password” as password.

This is Essbase studio startup page.

Hyperion 11.1.1.3 Environment Variable
The below environment variable gets set during Essbase Server installation.The Environment Variable can be viewed from my computer Advance Properties.

Multi Server Environment
In the multiple servers environment one EAS server can connect to multiple Essbase server. This enables you to administer multiple Essbase servers from one EAS Console.

There are two servers in my network one is Essbase server 11.1.1.3 and other Essbase server 9.3.1.3. Multiple Essbase servers can be connected to single EAS console. Below shows adding 2nd Essbase server to my EAS Console.

Connect remote Essbase server “vadminis-064ad2” to existing server EAS “orgbisp”.

Similarly you can connect both sever as cross connection. Connect to Essbase server 11.1.1.3 “orgbisp” to Essbase server “vadminis-064ad2”.

Note: - Essbase Server should be on shared mode.

You can access both servers from one EAS console.
Adding Multiple EAS in one EAS Console.
Multiple Essbase admin Services can be connected to one EAS console. Below shows how to add multiple EAS server in one console.
Right click :- Add Administration Server.
Right click :- Add Administration Server.

Enter server name.

You can see both servers are up and running.

For connecting other server enter server name and password.

Hi ,
ReplyDeleteI need to download only essbase component from the e-dilevery, so for that which are the files are required that I need to download , because part is start from part 2 , part 2 and so on .
hadoop online course
ReplyDeleteData Science online course
linux online course
etl testing online course
web methods online course